
How to Fix AxiosError: Request Failed with Status Code 403
Learn to fix the AxiosError: Request failed with status code 403. Set proper headers, rotate proxies, add delays, or use a scraping API for anti-bot bypass.

Getting an "AxiosError: Request failed with status code 403" when scraping means the server is actively blocking your request.
This guide walks through proven fixes for the Axios 403 error, from setting the right headers to deploying proxies, and identifies the solution that works at scale.
The fastest way to fix "AxiosError" is to use a dedicated web scraping API, which automatically handles proxies, headers, and anti-bot bypass. For manual fixes: set a real browser user agent, add complete request headers, use proxies to avoid IP bans, and add delays between requests.
What Is an Axios Code 403?
An Axios 403 error in NodeJS means the server understands your request but forbids it and can't grant access. This 403 web scraping issue in Node.js occurs when the server flags you as a bot due to IP bans, rate limiting, request filtering, misconfigured headers, or, worse, Cloudflare anti-bot protection.
The error (AxiosError: request failed with status code 403) typically looks like this in your terminal:
Error: AxiosError: Request failed with status code 403
Does this problem sound familiar?
Let's walk through the proven ways to prevent it while using Axios for web scraping.
1. Scraping API to Bypass AxiosError 403 in JavaScript
Scraping APIs are at the top of the game, allowing you to scrape websites effectively without getting blocked by anti-bot measures.
Tools like ZenRows support seamless integration with Axios and effectively bypass anti-bot measures.
Adding these functionalities to your Axios request helps your scraper bypass the Axios 403 forbidden error without hassle.
Using ZenRows, let's see how to apply these features to an Axios request to the Antibot Challenge page, a website protected by Cloudflare.
Sending a standard request to this website without scraping API support returns the following Axios Cloudflare 403 error:
AxiosError: Request failed with status code 403
To bypass this blockage using a scraping API, sign up and go to the ZenRows Universal Scraper API playground to follow along. Paste the target URL into the link field, then activate Adaptive Stealth Mode.
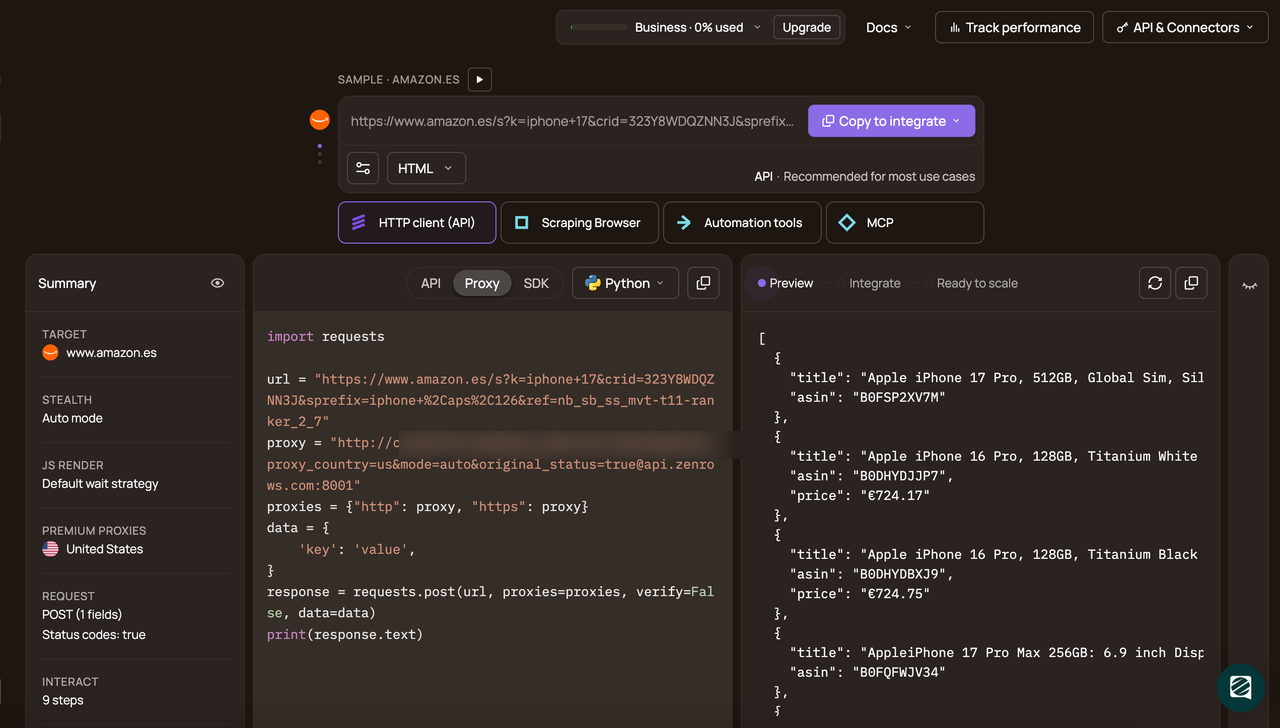
Select the API option and choose Node.js as your programming language. Copy and paste the generated code into your scraper script.
The generated code should look like this:
// npm install axios
const axios = require('axios');

const url = 'https://www.scrapingcourse.com/antibot-challenge';
const apikey = '<YOUR_ZENROWS_API_KEY>';
axios({
    url: 'https://api.zenrows.com/v1/',
    method: 'GET',
    params: {
        'url': url,
        'apikey': apikey,
        'mode': 'auto',
    },
})
    .then(response => console.log(response.data))
    .catch(error => console.log(error));
Running the code should output the complete HTML of the page, revealing the page title as shown.
<html lang="en">
<head>
    <!-- ... -->
    <title>Antibot Challenge - ScrapingCourse.com</title>
    <!-- ... -->
</head>
<body>
    <!-- ... -->
    <h2>
        You bypassed the Antibot challenge! :D
    </h2>
    <!-- other content omitted for brevity -->
</body>
</html>
The HTML output indicates that Axios has bypassed the anti-bot challenge.
Although this is the best option for bypassing anti-bots, it's great to have multiple solutions. Let's consider other methods to help you understand and remove this error.
Skip the blocks. Try Zenrows free and get clean web data without the anti-bot fight.
2. Optimize Your Request Frequency
Rate limiting allows websites to automatically flag and ban an IP address that exceeds the request limit, resulting in an Axios 403 forbidden error.
Limiting request frequency at intervals can prevent rate limiting. You can achieve this by increasing the interval between requests or by using exponential backoff, which is more intuitive.
How does interval delay work?
Use Interval Delays to Reduce Rate Frequency
Interval delay pauses request execution for a specified time before the subsequent one. Let's quickly see a custom function that delays between retries.
The code below sets the request count to 5 and adds a 3-second interval between requests.
// npm install axios
const axios = require('axios');

const targetUrl = 'https://httpbin.io/';

// configure access method
const configRule = {
    method: 'get',
}

// create the scheduler function
const requestScheduler=async()=> {
    console.log('Scraper - Start');

    const countRange = 5; // set the desired count range
    const delayBetweenRequests = 2000; // set the delay between each request in milliseconds

    for (let count = 1; count <= countRange; count++) {
        // run the delayed code for each count
        await delayedRequest(count, configRule, targetUrl);

        // pause for the specified delay between each request
        if (count < countRange) {
            await new Promise(resolve => setTimeout(resolve, delayBetweenRequests));
        }
    }

    console.log('Main code - End');
}
requestScheduler calls delayedRequest for each request in the loop. Here's how to define that function:
// define the Axios request function
const delayedRequest=async(count, rule, targetUrl)=>{
    console.log(`Request #${count}`);

    try {
        // pass the configuration rule and target URL
        const response = await axios.request({ ...rule, url: targetUrl });

        // handle the successful response
        console.log(
            response.status === 200 ?
             `Response: ${response.status}`
             : `Unexpected status: ${response.status}`
             );
    } catch (error) {
        // handle errors
        console.error('Error:', error.message);
    }
}
Call the scheduler function at the bottom of the code file to execute the Axios request at intervals.
// run the scheduler to start making HTTP requests at intervals
requestScheduler();
The code looks like this when merged:
// npm install axios
const axios = require('axios');

const targetUrl = 'https://httpbin.io/';

// configure access method
const configRule = {
    method: 'get',

}

// create the scheduler function
const requestScheduler=async()=> {
    console.log('Scraper - Start');

    const countRange = 5; // set the desired count range
    const delayBetweenRequests = 2000; // set the delay between each request in milliseconds

    for (let count = 1; count <= countRange; count++) {
        // run the delayed code for each count
        await delayedRequest(count, configRule, targetUrl);

        // pause for the specified delay between each request
        if (count < countRange) {
            await new Promise(resolve => setTimeout(resolve, delayBetweenRequests));
        }
    }

    console.log('Main code - End');
}


// define the Axios request function
const delayedRequest=async(count, rule, targetUrl)=>{
    console.log(`Request #${count}`);

    try {
        // pass the configuration rule and target URL
        const response = await axios.request({ ...rule, url: targetUrl });

        // handle the successful response
        console.log(
            response.status === 200 ?
             `Response: ${response.status}`
             : `Unexpected status: ${response.status}`
             );
    } catch (error) {
        // handle errors
        console.error('Error:', error.message);
    }
}

// run the scheduler to start making HTTP requests at intervals
requestScheduler();
The timed schedule runs as shown.
Scraper - Start
Request #1
Response: 200
Request #2
Response: 200
Request #3
Response: 200
Request #4
Response: 200
Request #5
Response: 200
Main code - End
While delaying requests can help bypass rate limiting, it can still reveal that you are a bot due to the consistent pauses, resulting in an IP ban. You can deploy proxies to boost your requests.
3. Deploy Proxies to Randomize Your IP
Proxies allow you to mask your IP during web scraping. When you randomize them, the server thinks your request is coming from different regions, allowing you to bypass the Axios 403 error caused by an IP ban.
Related: How to Bypass IP Ban When Scraping in 2026
Thankfully, there are various ways to use proxies with Axios, making it the most effective way to avoid IP bans.
Datacenter and residential proxies are the most common proxy types. However, residential premium proxies are the best for web scraping since they originate from internet service providers (ISPs).
Cost-effective premium residential proxy providers like ZenRows let you easily deploy proxies into your scrapers.
To deploy one, sign up with ZenRows and go to the residential Proxy Generator playground. Copy your proxy credentials (username and password) and set up your proxy in the config_rule as shown:
// npm install axios
const axios = require('axios');

// configure your proxy credentials
const proxyUsername = "<ZENROWS_PROXY_USERNAME>";
const proxyPassword = "<ZENROWS_PROXY_PASSWORD>";
const proxyDomain = "superproxy.zenrows.com";
const proxyPort = 1337;

// configure access method with proxy
const config_rule = {
    method: 'get',
    headers: {
        'user-agent': 'Mozilla/5.0 (Windows NT 10.0; Win64; x64) AppleWebKit/537.36 (KHTML, like Gecko) Chrome/128.0.0.0 Safari/537.36',
    },
    proxy: {
        protocol: 'http',
        host: proxyDomain,
        port: proxyPort,
        auth: {
            username: proxyUsername,
            password: proxyPassword,
        },
    },
}
After adding the proxy parameter, including the authentication information, extend the script with the code below to log the current IP address from https://httpbin.io/ip, a test endpoint that returns your IP address.
// ...

const url = 'https://httpbin.io/ip'

// pass configuration and target URL detail into Axios request
axios.request({...config_rule, url})
  .then(response => {
    // handle the successful response
    response.status === 200?
    console.log('Response:', response.data):
    console.log(response.status);
  })
  .catch(error => {
    // handle errors
    console.error('Error:', `${error}`);
  });
Running the code a few times yields different IPs per request, indicating periodic IP switching.
Response: { origin: '182.169.199.156:53703' }
Response: { origin: '189.253.121.139:37143' }
Response: { origin: '221.124.116.233:50234' }
Response: { origin: '81.38.229.90:38300' }
The added premium proxy now manages IP rotation, periodically randomizing it from a pool at its discretion. Want to see more custom solutions? You can also change the default Axios user agent. The next section will explain this in detail.
4. Change your User Agent to Solve Axios 403 Error
The default Axios user agent is vulnerable to anti-bot detection because it doesn't convey ideal client information, resulting in a 403 error.
Let's see the default Axios user agent with the following code.
// npm install axios
const axios = require('axios');

// configure access method, including user-agent in header and proxy rules
const config_rule = {
    method: 'get',

}

const url = 'https://httpbin.io/user-agent'

// pass configuration and target URL detail into Axios request
axios.request({...config_rule, url})
  .then(response => {
    // handle the successful response
    response.status === 200?
    console.log('Response:', response.data):
    console.log(response.status);
  })
  .catch(error => {
    // handle errors
    console.error('Error:', `${error}`);
  });
Note
We only used
https://httpbin.io/user-agentas a test website to show the current user agent since it has this endpoint (/user-agent). Appending theuser-agentdirectory to regular websites won't work. Instead, you can useresponse.config.headersto view the user agent in the request header.
Here's the result:
Response: { 'user-agent': 'axios/1.16.1' }
As seen above, the User-Agent value is axios/1.6.2. It gives the server little or no information about the client and might get blocked easily. The goal is to change this to a browser format, which is less likely to get blocked.
Most browser user agents include the OS information, platform details, and supported extensions. A typical browser user agent that's less likely to get blocked looks like this:
Mozilla/5.0 (Windows NT 10.0; Win64; x64) AppleWebKit/537.36 (KHTML, like Gecko) Chrome/148.0.0.0 Safari/537.36
You don't have to generate this yourself. Feel free to copy one from the top list of user agents for web scraping.
To change the default user agent in Axios, pass a user-agent key to your request header as shown:
// npm install axios
const axios = require('axios');

// configure access method, including user-agent in header and proxy rules
const config_rule = {
    method: 'get',
    headers: {
        'user-agent': 'Mozilla/5.0 (Windows NT 10.0; Win64; x64) AppleWebKit/537.36 (KHTML, like Gecko) Chrome/148.0.0.0 Safari/537.36'
    },

}

const url = 'https://httpbin.io/user-agent'

// pass configuration and target URL detail into Axios request
axios.request({...config_rule, url})
  .then(response => {
    // handle the successful response
    response.status === 200?
    console.log('Response:', response.data):
    console.log(response.status);
  })
  .catch(error => {
    // handle errors
    console.error('Error:', `${error}`);
  });
Running the code outputs the following, indicating your request now uses the custom user agent.
Response: {
  'user-agent': 'Mozilla/5.0 (Windows NT 10.0; Win64; x64) AppleWebKit/537.36 (KHTML, like Gecko) Chrome/148.0.0.0 Safari/537.36'
}
The server sometimes eventually blocks a user agent due to frequent requests. So, more than sticking to one user agent is required. Randomizing your user agents per request solves this problem.
Next, let's explore how to achieve this.
Randomize the User Agent in Axios Request
User-agent randomization routes your Axios requests through different user agents per request, helping your scraper avoid the Axios 403 Forbidden error.
The following function (getRandomUserAgent) rotates the user agents from the userAgents list. Remember to extend this list from the best scraping user agents.
// npm install axios
const axios = require('axios');

// create a User Agent list
const userAgents = [
    'Mozilla/5.0 (Windows NT 10.0; Win64; x64) AppleWebKit/537.36 (KHTML, like Gecko) Chrome/148.0.0.0 Safari/537.36',
    'Mozilla/5.0 (Macintosh; Intel Mac OS X 10_15_7) AppleWebKit/537.36 (KHTML, like Gecko) Chrome/148.0.0.0 Safari/537.36',
    'Mozilla/5.0 (X11; Linux x86_64) AppleWebKit/537.36 (KHTML, like Gecko) Chrome/148.0.0.0 Safari/537.36',
];

// function to get a random user agent from the user agents list
const getRandomUserAgent = (userAgentsList) => {
    const randomIndex = Math.floor(Math.random() * userAgentsList.length);
    return userAgentsList[randomIndex];
};
Next, apply the randomization to your Axios request.
// specify the target URL
const url = 'https://httpbin.io/user-agent';

// pass the function to a variable
const randomUserAgent = getRandomUserAgent(userAgents);

// configure your Axios request
const configRule = {
    method: 'get',
    url: url,  // this line uses 'url' directly in the config
    // pass the randomized user agents to the request header
    headers: {
        'user-agent': randomUserAgent,
    },
};

// make an Axios request
axios.request(configRule)
    .then(response => {
        // handle the successful response and output the request headers
        response.status === 200 ?
            console.log('Response:', response.data) :
            console.log('Could not fetch page');
    })
    .catch(error => {
        // handle errors
        console.error('Error:', error.message);
    });
The request header passes randomUserAgent as the user agent value, allowing this function to take effect.
The combined code looks like this:
// npm install axios
const axios = require('axios');

// create a User Agent list
const userAgents = [
    'Mozilla/5.0 (Windows NT 10.0; Win64; x64) AppleWebKit/537.36 (KHTML, like Gecko) Chrome/148.0.0.0 Safari/537.36',
    'Mozilla/5.0 (Macintosh; Intel Mac OS X 10_15_7) AppleWebKit/537.36 (KHTML, like Gecko) Chrome/148.0.0.0 Safari/537.36',
    'Mozilla/5.0 (X11; Linux x86_64) AppleWebKit/537.36 (KHTML, like Gecko) Chrome/148.0.0.0 Safari/537.36',
];

// function to get a random user agent from the list
const getRandomUserAgent = (userAgentsList) => {
    const randomIndex = Math.floor(Math.random() * userAgentsList.length);
    return userAgentsList[randomIndex];
};


// specify the target URL
const url = 'https://httpbin.io/user-agent';

// pass the function to a variable
const randomUserAgent = getRandomUserAgent(userAgents);

// configure your Axios request
const configRule = {
    method: 'get',
    url: url,  // this line uses 'url' directly in the config
    // pass the randomized user agents to the request header
    headers: {
        'user-agent': randomUserAgent,
    },
};

// make an Axios request
axios.request(configRule)
    .then(response => {
        // handle the successful response and output the request headers
        response.status === 200 ?
            console.log('Response:', response.data) :
            console.log('Could not fetch page');
    })
    .catch(error => {
        // handle errors
        console.error('Error:', error.message);
    });
Run the code a few times, and the user agents will change randomly for each request:
Response: {
  'user-agent': 'Mozilla/5.0 (Windows NT 10.0; Win64; x64) AppleWebKit/537.36 (KHTML, like Gecko) Chrome/148.0.0.0 Safari/537.36'
}
Response: {
  'user-agent': 'Mozilla/5.0 (Macintosh; Intel Mac OS X 10_15_7) AppleWebKit/537.36 (KHTML, like Gecko) Chrome/148.0.0.0 Safari/537.36'
}
Response: {
  'user-agent': 'Mozilla/5.0 (Windows NT 10.0; Win64; x64) AppleWebKit/537.36 (KHTML, like Gecko) Chrome/148.0.0.0 Safari/537.36'
}
Response: {
  'user-agent': 'Mozilla/5.0 (X11; Linux x86_64) AppleWebKit/537.36 (KHTML, like Gecko) Chrome/148.0.0.0 Safari/537.36'
}
Want to scale this further? You can deploy a full-scale header.
5. Make Sure Your Headers Are Complete
Unlike conventional browsers, which include full request headers, Axios doesn't include all the header strings required for scraping and smooth server access.
Let's quickly see what's in the Axios default headers. The code below displays this information from the test endpoint (https://httpbin.io/headers):
// npm install axios
const axios = require('axios');

// configure access method, including user-agent in header and proxy rules
const config_rule = {
    method: 'get',

}

const url = 'https://httpbin.io/headers'

// pass configuration and target URL detail into Axios request
axios.request({...config_rule, url})
  .then(response => {
    // handle the successful response
    response.status === 200?
    console.log('Response:', response.data):
    console.log(response.status);
  })
  .catch(error => {
    // handle errors
    console.error('Error:', `${error}`);
  });
The above code outputs the following header details:
headers: {
    Accept: ["application/json, text/plain, */*"],
    "Accept-Encoding": ["gzip, compress, deflate, br"],
    Connection: ["keep-alive"],
    Host: ["httpbin.io"],
    "User-Agent": ["axios/1.16.1"],
}
Let's compare this to that of a real browser like Chrome.
To do so, just open your browser to go to https://httpbin.io/headers, and you'll see the typical real browser header set:
{
    "headers": {
        "Accept": [
            "text/html,application/xhtml+xml,application/xml;q=0.9,image/avif,image/webp,image/apng,*/*;q=0.8,application/signed-exchange;v=b3;q=0.7"
        ],
        "Accept-Encoding": ["gzip, deflate, br, zstd"],
        "Accept-Language": ["en-US,en;q=0.9"],
        "Connection": ["keep-alive"],
        "Dnt": ["1"],
        "Host": ["httpbin.io"],
        "Referer": ["https://www.google.com/"],
        "Sec-Ch-Ua": [
            '"Chromium";v="148", "Google Chrome";v="148", "Not/A)Brand";v="99"'
        ],
        "Sec-Ch-Ua-Mobile": ["?0"],
        "Sec-Ch-Ua-Platform": ['"Windows"'],
        "Sec-Fetch-Dest": ["document"],
        "Sec-Fetch-Mode": ["navigate"],
        "Sec-Fetch-Site": ["cross-site"],
        "Upgrade-Insecure-Requests": ["1"],
        "User-Agent": [
            "Mozilla/5.0 (Windows NT 10.0; Win64; x64) AppleWebKit/537.36 (KHTML, like Gecko) Chrome/148.0.0.0 Safari/537.36"
        ],
    }
}
You can also obtain the header information for a specific site by opening the "Network" tab in your Chrome browser (right-click anywhere on the target web page, then select "Inspect" > "Network"). Select a request in the network traffic table, then click "Headers".
Scroll down to "Request Headers" to see the complete header details:
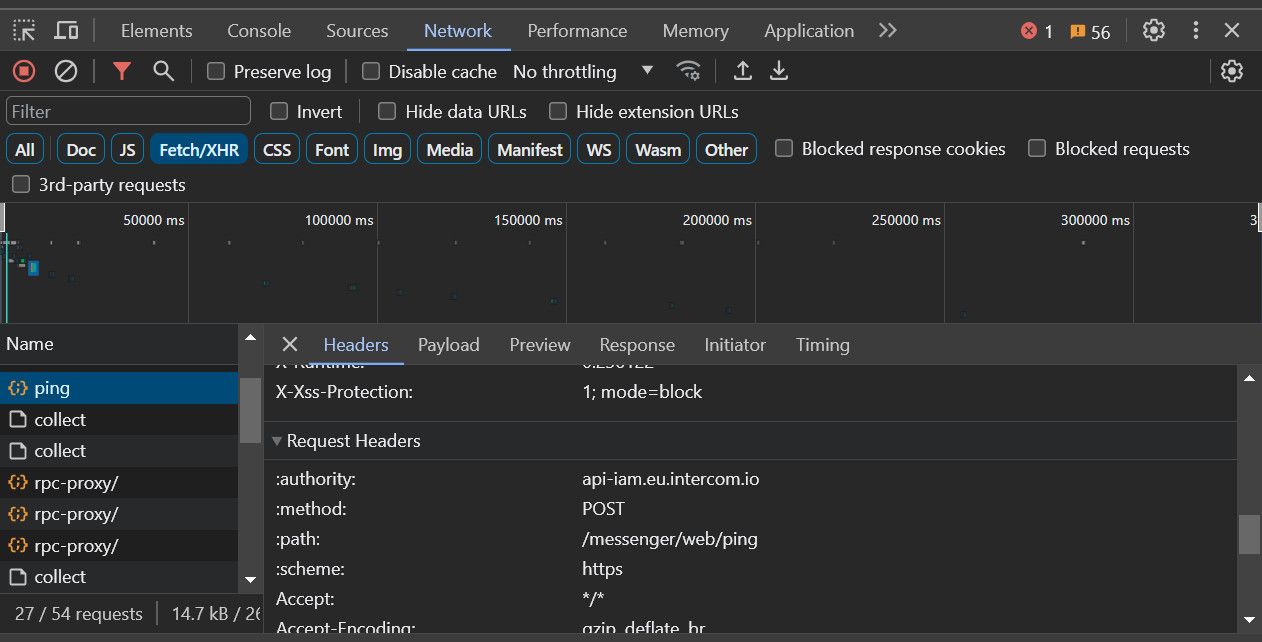
The above option is particularly useful if you want to adapt your target site's specific headers to your request, since header requirements can vary by site. So, yours might be different depending on the current website.
To override the Axios default headers with those of a real browser, copy the Chrome request headers from the Network tab and apply them like this:
// npm install Axios
const axios = require('axios');

// store the request headers from chrome into a variable
const reqHeaders = {
  'authority': 'www.google.com',
  'accept': 'text/html,application/xhtml+xml,application/xml;q=0.9,image/avif,image/webp,image/apng,*/*;q=0.8,application/signed-exchange;v=b3;q=0.7',
  'accept-language': 'en-US,en;q=0.9',
  'cache-control': 'max-age=0',
  'cookie': 'SID=ZAjX93QUU1NMI2Ztt_dmL9YRSRW84IvHQwRrSe1lYhIZncwY4QYs0J60X1WvNumDBjmqCA.; __Secure-#..', // cookie value truncated for brevity
  'sec-ch-ua': '"Not/A)Brand";v="99", "Google Chrome";v="148", "Chromium";v="148"',
  'sec-ch-ua-arch': '"x86"',
  'sec-ch-ua-bitness': '"64"',
  'sec-ch-ua-full-version': '"115.0.5790.110"',
  'sec-ch-ua-full-version-list': '"Not/A)Brand";v="99.0.0.0", "Google Chrome";v="148.0.0.0", "Chromium";v="148.0.0.0',
  'sec-ch-ua-mobile': '?0',
  'sec-ch-ua-model': '""',
  'sec-ch-ua-platform': 'Windows',
  'sec-ch-ua-platform-version': '15.0.0',
  'sec-ch-ua-wow64': '?0',
  'sec-fetch-dest': 'document',
  'sec-fetch-mode': 'navigate',
  'sec-fetch-site': 'same-origin',
  'sec-fetch-user': '?1',
  'upgrade-insecure-requests': '1',
  'user-agent': 'Mozilla/5.0 (Windows NT 10.0; Win64; x64) AppleWebKit/537.36 (KHTML, like Gecko) Chrome/148.0.0.0 Safari/537.36',
};

// configure access method, including user-agent in header and proxy rules
const config_rule = {
    method: 'get',
// spread the properties of reqHeaders into the request headers
    headers:{
      ...reqHeaders
    }
}

const url = 'https://httpbin.io/'

// pass configuration and target URL detail into Axios request
axios.request({...config_rule, url})
  .then(response => {
    // handle the successful response
    response.status === 200?
    console.log('Response:', response.data):
    console.log(response.status);
  })
  .catch(error => {
    // handle errors
    console.error('Error:', `${error}`);
  });
Running the code to confirm the changes, here's what the output looks like:
  headers: {
    Accept: [
      'text/html,application/xhtml+xml,application/xml;q=0.9,image/avif,image/webp,image/apng,*/*;q=0.8,application/signed-exchange;v=b3;q=0.7'
    ],
    'Accept-Encoding': [ 'gzip, compress, deflate, br' ],
    'Accept-Language': [ 'en-US,en;q=0.9' ],
    Authority: [ 'www.google.com' ],
    'Cache-Control': [ 'max-age=0' ],
    Connection: [ 'keep-alive' ],
    Cookie: [
      'SID=ZAjX93QUU1NMI2Ztt_dmL9YRSRW84IvHQwRrSe1lYhIZncwY4QYs0J60X1WvNumDBjmqCA.; __Secure-#..'
    ],
// ...omitted for brevity
}
Try scaling this by applying the previous user agent randomization function to the user-agent parameter.
You can update your code like this:
// ...
// create a User Agent list
const userAgents = [
    'Mozilla/5.0 (Windows NT 10.0; Win64; x64) AppleWebKit/537.36 (KHTML, like Gecko) Chrome/148.0.0.0 Safari/537.36',
    'Mozilla/5.0 (Macintosh; Intel Mac OS X 10_15_7) AppleWebKit/537.36 (KHTML, like Gecko) Chrome/148.0.0.0 Safari/537.36',
    'Mozilla/5.0 (X11; Linux x86_64) AppleWebKit/537.36 (KHTML, like Gecko) Chrome/148.0.0.0 Safari/537.36',
];

// function to get a random user agent from the list
const getRandomUserAgent = (userAgentsList) => {
  const randomIndex = Math.floor(Math.random() * userAgentsList.length);
  return userAgentsList[randomIndex];
};

const randomUserAgent = getRandomUserAgent(userAgents);

const reqHeaders = {
  'authority': 'www.google.com',
  'accept': 'text/html,application/xhtml+xml,application/xml;q=0.9,image/avif,image/webp,image/apng,*/*;q=0.8,application/signed-exchange;v=b3;q=0.7',
  'accept-language': 'en-US,en;q=0.9',
  'cache-control': 'max-age=0',
  'cookie': 'SID=ZAjX93QUU1NMI2Ztt_dmL9YRSRW84IvHQwRrSe1lYhIZncwY4QYs0J60X1WvNumDBjmqCA.; __Secure-#..', // cookie value truncated for brevity
  'sec-ch-ua': '"Not/A)Brand";v="99", "Google Chrome";v="148", "Chromium";v="148"',
  'sec-ch-ua-arch': '"x86"',
  'sec-ch-ua-bitness': '"64"',
  'sec-ch-ua-full-version': '"115.0.5790.110"',
  'sec-ch-ua-full-version-list': '"Not/A)Brand";v="99.0.0.0", "Google Chrome";v="148.0.0.0", "Chromium";v="148.0.0.0',
  'sec-ch-ua-mobile': '?0',
  'sec-ch-ua-model': '""',
  'sec-ch-ua-platform': 'Windows',
  'sec-ch-ua-platform-version': '15.0.0',
  'sec-ch-ua-wow64': '?0',
  'sec-fetch-dest': 'document',
  'sec-fetch-mode': 'navigate',
  'sec-fetch-site': 'same-origin',
  'sec-fetch-user': '?1',
  'upgrade-insecure-requests': '1',
  'user-agent': randomUserAgent,
};
//...
This technique can be effective, but combine it with the other ones mentioned earlier for better results.
Conclusion
As you've seen, fixing the "AxiosError: Request failed with status code 403" comes down to understanding why the server is blocking you. Setting proper headers and rotating User Agents handle basic detection; proxies solve IP bans; and limiting your request rate fixes pattern-based blocks.
For sites with advanced anti-bot protection, a scraping API such as ZenRows handles all of this automatically, so you can focus on the data. Try ZenRows for free now or speak with sales!