
How to Mimic Real Human Interactions with HumanCursor During Scraping
Learn to simulate realistic random cursor movement with HumanCursor. Browse exactly like a human during scraping to evade detection.

When scraping an anti-bot-protected website, getting a 200 OK response and the first-page HTML isn’t the hard part. The block shows up once your script starts interacting with the page. A few clicks in, you hit a 403 error or a challenge page. That often happens because the mouse behavior looks automated.
HumanCursor can help you fix that by generating human-like mouse movement and timing. This article covers what HumanCursor is, how it works, how to use it with Selenium for real page interactions, and where cursor simulation falls short.
What Is HumanCursor?
HumanCursor is a Python library that moves the mouse cursor in a way that looks closer to real use. It doesn’t jump straight to an element and click. It moves at random speeds and along curved paths, which helps evade anti-bot behavior checks that look for straight-line moves and zero-delay clicks.
HumanCursor has three main components, and each one fits a different kind of automation work.
- WebCursor: Controls the cursor inside a Selenium browser session, with Chrome and Edge as the main supported browsers. Firefox and Safari are described as not optimal or untested.
- SystemCursor: Controls the physical mouse on your desktop using screen coordinates. This is separate from Selenium and acts at the OS level.
- HCScripter: Records real mouse actions and turns them into a SystemCursor script, so the same movement can be replayed later.
Note
HumanCursor is a UI interaction tool, not a full scraping or anti-bot solution. It helps with mouse movement and clicks, but you can still be blocked by JavaScript challenges, browser fingerprint checks, request pattern rules, IP reputation scoring, etc.
How Does HumanCursor Work?
HumanCursor enables your web scraper to follow random paths to the target site rather than jumping there in a single step. It breaks the movement into smaller points, then moves through them at varying speeds and directions. The result is a curved trajectory with acceleration and deceleration that more closely resembles how people move the mouse.
The WebCursor component of HumanCursor applies the same concept within an automated browser context, such as a Selenium session. You pass either a DOM (Document Object Model) element or a pair of viewport coordinates, and the cursor moves along the generated path before it clicks, drags, or scrolls. Because it runs inside Selenium, it can tie the movement to what the page exposes as elements.
SystemCursor uses the same approach, but it works only with screen coordinates. It doesn’t know what a DOM element is, and it can’t find a button on the page. It just moves the real OS cursor to the x and y coordinates you provide, then performs the action there.
Skip the blocks. Try Zenrows free and get clean web data without the anti-bot fight.
How to Use HumanCursor
In this section, you’ll learn how to use HumanCursor with Selenium to move the cursor to real page elements and click them without instant jumps. You’ll use the ScrapingCourse ecommerce page as the target site and run a few cursor moves and clicks. You can reuse the same pattern on your own target site by swapping selectors and page checks.
Step 1: Set Up Selenium And HumanCursor
Start by installing HumanCursor. The command also installs Selenium automatically because it is a dependency of HumanCursor.
pip install --upgrade humancursor
Then import the required libraries, open a browser, and attach HumanCursor to the Selenium session.
from selenium import webdriver
from selenium.webdriver.common.by import By
from selenium.webdriver.support.ui import WebDriverWait
from humancursor import WebCursor

driver = webdriver.Chrome()  # launch chrome browser
driver.set_window_size(1280, 900)  # set window dimensions
wait = WebDriverWait(driver, 20)  # wait up to 20 seconds for elements
cursor = WebCursor(driver)  # create human-like cursor controller

try:
    driver.get("https://www.scrapingcourse.com/ecommerce/")  # navigate to shop
    cursor.show_cursor()  # display visual cursor for debugging
This code launches Chrome with a fixed window size so element positions stay consistent. It also establishes a shared wait object, so interactions depend on page state rather than hard sleeps. It then attaches HumanCursor to the browser so that clicks occur via cursor movement rather than direct DOM calls. Finally, it loads the target site and makes the cursor visible so you can see how HumanCursor behaves during each interaction.
Step 2: Wait For The Target Element
Before moving the cursor, explicitly wait for the first element you plan to click to become visible. This is necessary because Selenium can match elements in the DOM before they’re visible or able to receive a click, such as when the element is hidden by CSS or covered by a loading overlay.
If you click too early, Selenium often throws ElementNotInteractableException, or it throws ElementClickInterceptedException when another element intercepts the click.
# ...
   # wait for first "add to cart" button to appear and be visible
    btn1 = wait.until(
        lambda d: next(
            (e for e in d.find_elements(By.CSS_SELECTOR, "a.add_to_cart_button")
             if e.is_displayed()),
            False
        )
    )
This wait removes timing uncertainty and provides HumanCursor with a stable target to work with.
Step 3: Scroll The Element Into View
Once the element is visible, scroll it into view.
# ...
cursor.scroll_into_view_of_element(btn1)  # scroll so button is visible
Cursor movement only looks natural when it stays within the visible area of the page. Scrolling first ensures the cursor path remains on-screen instead of jumping in from outside the viewport.
Step 4: Move the Cursor and Click the Element
Move the cursor to the target element and click it. The following call moves the cursor along a natural path to the element and then clicks it.
# ...
cursor.click_on(btn1)  # click add to cart with human-like motion
HumanCursor controls the movement timing internally, preventing Selenium from clicking the element directly. On the example target page, this action clicks the Add to cart button.
Step 5: Repeat The Pattern For Each Interaction
After the first click, reuse the same sequence for all subsequent interactions on the page. Wait for the next visible element, scroll it into view, then click it with HumanCursor.
On the example target site, click the Next pagination link, wait for the second page to load, add another item to the cart, and then view the items in the cart. Finally, pause the script so the browser stays open while you confirm the cart state. The browser only closes when you press Enter.
# ...
   # find and click the "next page" pagination link
    nxt = wait.until(
        lambda d: next(
            (e for e in d.find_elements(By.CSS_SELECTOR, "a.next")
             if e.is_displayed()),
            False
        )
    )
    cursor.scroll_into_view_of_element(nxt)
    cursor.click_on(nxt)
    # wait for page 2 to load
    wait.until(
        lambda d: any(
            e.text == "2"
            for e in d.find_elements(By.CSS_SELECTOR, "span.page-numbers.current")
        )
    )
    cursor.show_cursor()  # re-show cursor after page change


    # find any available "add to cart" button on page 2
    btn2 = wait.until(
        lambda d: next(
            (e for e in d.find_elements(By.CSS_SELECTOR, "a.add_to_cart_button")
             if e.is_displayed()),
            False
        )
    )
    cursor.scroll_into_view_of_element(btn2)
    cursor.click_on(btn2)  # add second product to cart


    # click "view cart" link that appears after adding to cart
    view_cart = wait.until(
        lambda d: next(
            (e for e in d.find_elements(By.CSS_SELECTOR, "a.added_to_cart")
             if e.is_displayed()),
            False
        )
    )
    cursor.scroll_into_view_of_element(view_cart)
    cursor.click_on(view_cart)


    # wait for cart page to load and scroll cart contents into view
    cart = wait.until(
        lambda d: next(
            (e for e in d.find_elements(
                By.CSS_SELECTOR,
                ".wp-block-woocommerce-cart, tr.cart_item"
            ) if e.is_displayed()),
            False
        )
    )
    cursor.scroll_into_view_of_element(cart)
    driver.execute_script("window.scrollBy(0, 350);")  # scroll down a bit more to show full cart


    input("Done. Press Enter to close...")

finally:
    driver.quit()  # always close browser
Here is the full code so you can run the complete flow with ease.
from selenium import webdriver
from selenium.webdriver.common.by import By
from selenium.webdriver.support.ui import WebDriverWait
from humancursor import WebCursor

driver = webdriver.Chrome()  # launch chrome browser
driver.set_window_size(1280, 900)  # set window dimensions
wait = WebDriverWait(driver, 20)  # wait up to 20 seconds for elements
cursor = WebCursor(driver)  # create human-like cursor controller

try:
    driver.get("https://www.scrapingcourse.com/ecommerce/")  # navigate to shop
    cursor.show_cursor()  # display visual cursor for debugging

    # wait for first "add to cart" button to appear and be visible
    btn1 = wait.until(
        lambda d: next(
            (e for e in d.find_elements(By.CSS_SELECTOR, "a.add_to_cart_button")
             if e.is_displayed()),
            False
        )
    )
    cursor.scroll_into_view_of_element(btn1)  # scroll so button is visible
    cursor.click_on(btn1)  # click add to cart with human-like motion

    # find and click the "next page" pagination link
    nxt = wait.until(
        lambda d: next(
            (e for e in d.find_elements(By.CSS_SELECTOR, "a.next")
             if e.is_displayed()),
            False
        )
    )
    cursor.scroll_into_view_of_element(nxt)
    cursor.click_on(nxt)
    # wait for page 2 to load
    wait.until(
        lambda d: any(
            e.text == "2"
            for e in d.find_elements(By.CSS_SELECTOR, "span.page-numbers.current")
        )
    )
    cursor.show_cursor()  # re-show cursor after page change

    # find any available "add to cart" button on page 2
    btn2 = wait.until(
        lambda d: next(
            (e for e in d.find_elements(By.CSS_SELECTOR, "a.add_to_cart_button")
             if e.is_displayed()),
            False
        )
    )
    cursor.scroll_into_view_of_element(btn2)
    cursor.click_on(btn2)  # add second product to cart

    # click "view cart" link that appears after adding to cart
    view_cart = wait.until(
        lambda d: next(
            (e for e in d.find_elements(By.CSS_SELECTOR, "a.added_to_cart")
             if e.is_displayed()),
            False
        )
    )
    cursor.scroll_into_view_of_element(view_cart)
    cursor.click_on(view_cart)

    # wait for cart page to load and scroll cart contents into view
    cart = wait.until(
        lambda d: next(
            (e for e in d.find_elements(
                By.CSS_SELECTOR,
                ".wp-block-woocommerce-cart, tr.cart_item"
            ) if e.is_displayed()),
            False
        )
    )
    cursor.scroll_into_view_of_element(cart)
    driver.execute_script("window.scrollBy(0, 350);")  # scroll down a bit more to show full cart

    input("Done. Press Enter to close...")

finally:
    driver.quit()  # always close browser even if error occurs
Here are the results when you run the code.
Great! You've successfully simulated human-like behaviour using humancursor.
HumanCursor Advanced Cursor Events
Apart from the basic scroll and click flow you’ve used so far, HumanCursor supports other advanced cursor events like hover behavior, slider drags, and drag and drop, etc.
Move To
The move_to() method moves the cursor to a target element without clicking it. It supports a steady flag that affects how the cursor arrives at the target.
cursor.move_to(btn, steady=True)
With steady=True, the cursor movement tries to mimic how a human moves a cursor in a straight line.
Control Scroll Bar
This method drags a slider handle to a target position based on a percentage.
cursor.control_scroll_bar(slider, amount_by_percentage=1.0)
amount_by_percentage=1.0 drags the slider to the end. Smaller values move it partway, which maps cleanly to percent-based slider settings.
Drag And Drop Between Elements
This method drags a source element and releases it inside a target element. It supports drag_from_relative_position to control where the drag starts inside the source element.
cursor.drag_and_drop(drag, drop, drag_from_relative_position=[0.9, 0.9])
drag_from_relative_position=[0.9, 0.9] starts the drag near the bottom-right of the source element (as a percentage of its width and height).
Drag And Drop To Coordinates
The same drag_and_drop() method also supports dragging to a coordinate pair instead of a target element. The destination is passed as a two-item list.
cursor.drag_and_drop(box, [target_x, target_y], drag_from_relative_position=[0.9, 0.9])
This method is useful when you need to drop at a specific x and y location relative to the viewport. Use it when there isn’t a stable drop-zone element to target, such as a canvas or an empty area of the page.
Limitations of HumanCursor
While HumanCursor simulates cursor movement and clicks to make cursor behavior appear more natural, it won’t fix blocks driven by browser fingerprints, IP address reputation, or challenge pages. Cursor motion can also vary across machines and screen setups, so the same script won’t always behave the same way in different environments.
Coordinate and layout edge cases still break scraping executions. If a layout shifts, a sticky header appears, or the viewport changes, the target area may move, causing the interaction to miss. Longer interaction chains also become fragile because each additional step adds more selectors and state checks, increasing the number of points of failure.
At scale, Selenium plus HumanCursor still doesn’t hold up against many anti-bots because they evaluate the whole session, not just mouse movement. Automation fingerprints and WebDriver signals can still trigger blocks even when the cursor path looks natural. At this point, the best option is to rely on a web scraping API.
Solving HumanCursor’s Limitations with Web Scraping APIs
A web scraping API is a hosted service that handles scraping for you and returns the requested data. It wraps browser rendering, interaction, proxy routing, anti-bot bypass, and more behind a single endpoint.
Instead of maintaining a local browser stack, you send the target URL and a few parameters, and you get back rendered output that’s ready for parsing. This shifts the hard parts of scraping away from your machine and into a system built to run those sessions reliably.
ZenRows' universal scraper API is one of the best web scraping APIs for handling interaction-heavy and protected pages at scale. It returns rendered HTML, Markdown, screenshots, or structured data through JavaScript rendering. It also supports JavaScript instructions for clicks, scrolling, waits, form fills, and custom JavaScript, so you can replace long Selenium interaction chains with short instructions.
On top of that, it routes your requests through Premium proxies to reduce IP-based blocking. It also bypasses CAPTCHA and other anti-bot methods internally.
Let's see how Zenrows will handle the Antibot challenge page that actively blocks scrapers with advanced anti-bot protection.
Sign up for Zenrows, then open the Request Builder and paste the target URL. After that, enable JavaScript rendering and Premium proxies.
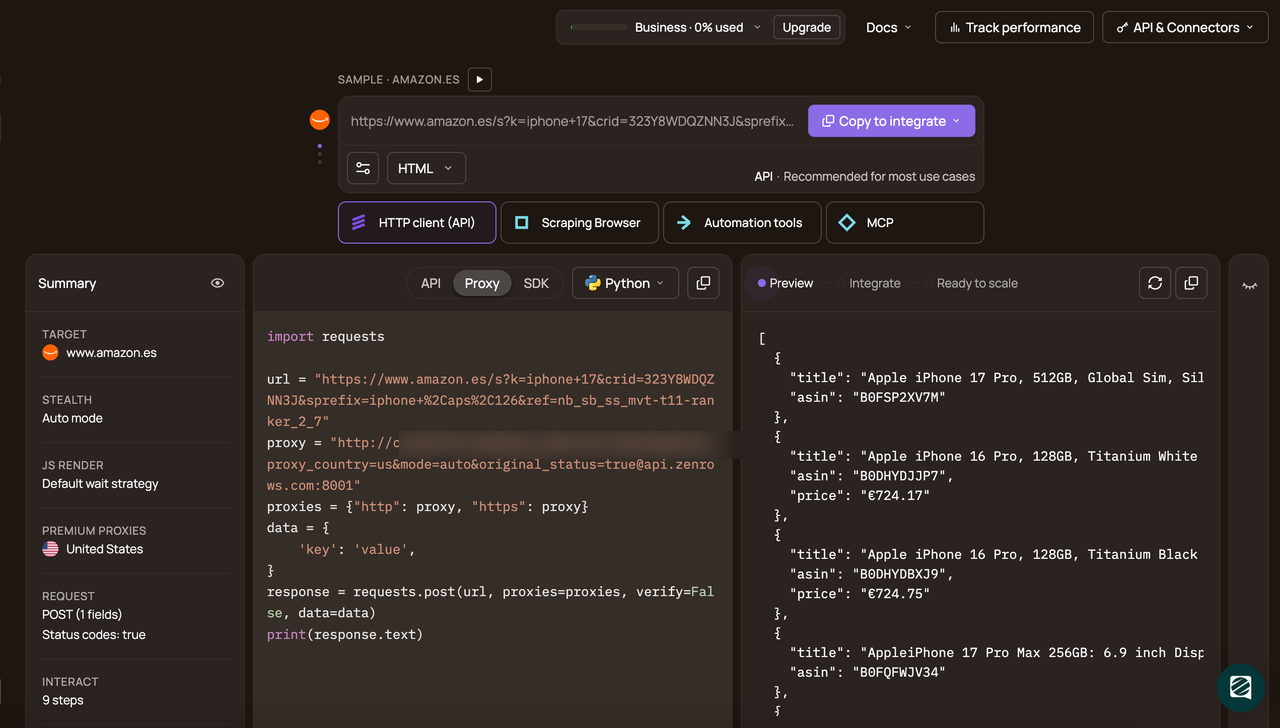
Finally, select the API connection mode and choose Python as your programming language.
Copy the generated code and paste it into your scraper.
# pip install requests
import requests

url = 'https://www.scrapingcourse.com/antibot-challenge'
apikey = '<YOUR_ZENROWS_API_KEY>'
params = {
    'url': url,
    'apikey': apikey,
    'js_render': 'true',
    'premium_proxy': 'true',
}
response = requests.get('https://api.zenrows.com/v1/', params=params)
print(response.text)
When you run the code, the output is as follows:
<html lang="en">
<head>
    <!-- ... -->
    <title>Antibot Challenge - ScrapingCourse.com</title>
    <!-- ... -->
</head>
<body>
    <!-- ... -->
    <h2>
        You bypassed the Antibot challenge! :D
    </h2>
    <!-- other content omitted for brevity -->
</body>
</html>
Congratulations! 🎉 You've bypassed the anti-bot challenge using ZenRows and returned the real page HTML without simulating cursor movement.
Conclusion
In this article, you learned how HumanCursor works and how to use it with Selenium for real page interactions. HumanCursor helps your Selenium scripts click and scroll in a more human-like way. That matters on targets that react to instant clicks or straight-line cursor movement, but it’s not a full anti-bot solution, so you can still hit fingerprint checks, challenge pages, and IP-based blocks.
If you need results at scale, a web scraping API is a better fit. ZenRows handles protected targets through managed rendering, proxy routing, and anti-bot handling, etc so you can spend your time on extraction instead of keeping a local browser stack alive.
Try ZenRows for free now or speak with sales!
FAQ
What problems does HumanCursor solve in scraping workflows?
HumanCursor helps when a target starts scoring your script based on how it clicks, scrolls, and hovers. It replaces instant, mechanical interactions with cursor motion that follows a path and timing that varies. That can reduce blocks triggered by interaction patterns, especially after the first page load.
Is HumanCursor suitable for production scraping?
No. It can help for small, controlled automation flows, but it’s not reliable for production scraping at scale. For production workloads, a managed scraping API like ZenRows is a better fit because it’s built to handle protected targets and operational overhead without relying on a local Selenium stack.
Can HumanCursor bypass Cloudflare or Akamai bot detection?
No. Cloudflare and Akamai score many signals, and cursor movement is only one of them. Selenium can still leak automation signals, so a web scraping API is the better option for these targets.
How do I use HumanCursor with Selenium to bypass bot detection?
Use HumanCursor to avoid instant clicks. Wait for visible elements, scroll them into view, then click with WebCursor so the cursor moves to the element first. If you still hit fingerprinting or challenge pages, switch to a scraping API like ZenRows and let it handle the blocks for you.
Can I Use HumanCursor With Other Scraping Libraries?
Yes, if the library uses Selenium. HumanCursor attaches to the Selenium driver and controls the cursor during browser actions. If you’re not using Selenium, use a driver-specific port, such as a HumanCursor Playwright/Patchright adaptation.